Follow Me On Social Media!
Crochet Christmas Tree Pattern: A Festive Layered Tree for Holiday Decorating

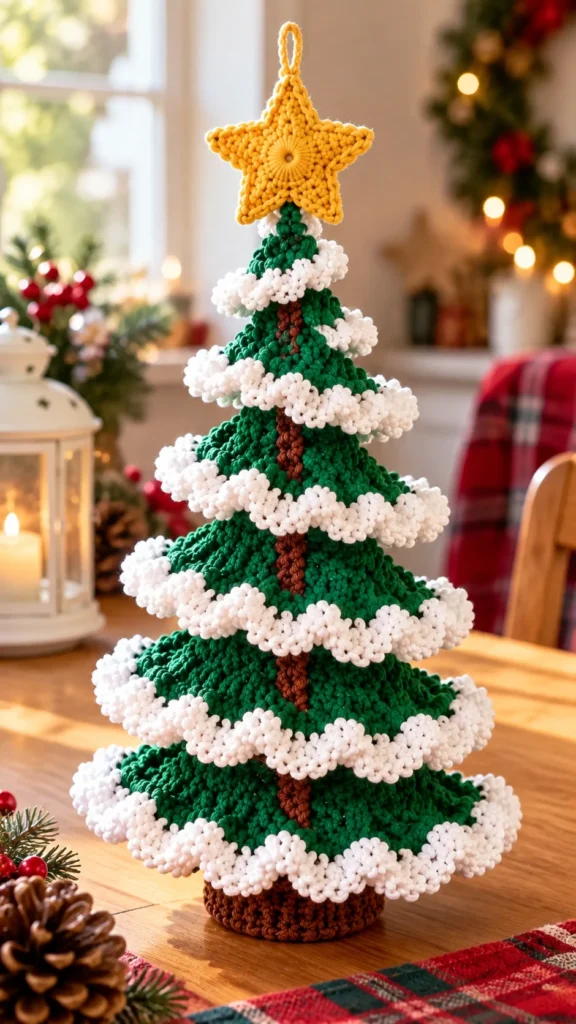
This crochet Christmas tree pattern is a beautiful handmade project for the holiday season. Made with rich green yarn, a brown trunk, fluffy white trim, and a crochet star on top, this little Christmas tree makes a charming decoration for a table, mantel, shelf, or holiday display.
The design is built in layers, giving the tree a full, dimensional shape. The white edging looks like freshly fallen snow, while the golden star adds the perfect finishing touch.
Below is a simple step-by-step visual guide based on the photos.
Materials You Will Need
- Green crochet yarn
- Brown crochet yarn
- White crochet yarn
- Gold or yellow yarn for the star
- Crochet hook suitable for your yarn
- Yarn needle
- Scissors
- Stitch marker, if needed
- Optional: stuffing or a small firm insert for extra stability
Choose a medium-weight yarn if you want a tree similar in size and texture to the example.
Step 1: Crochet the Brown Tree Base
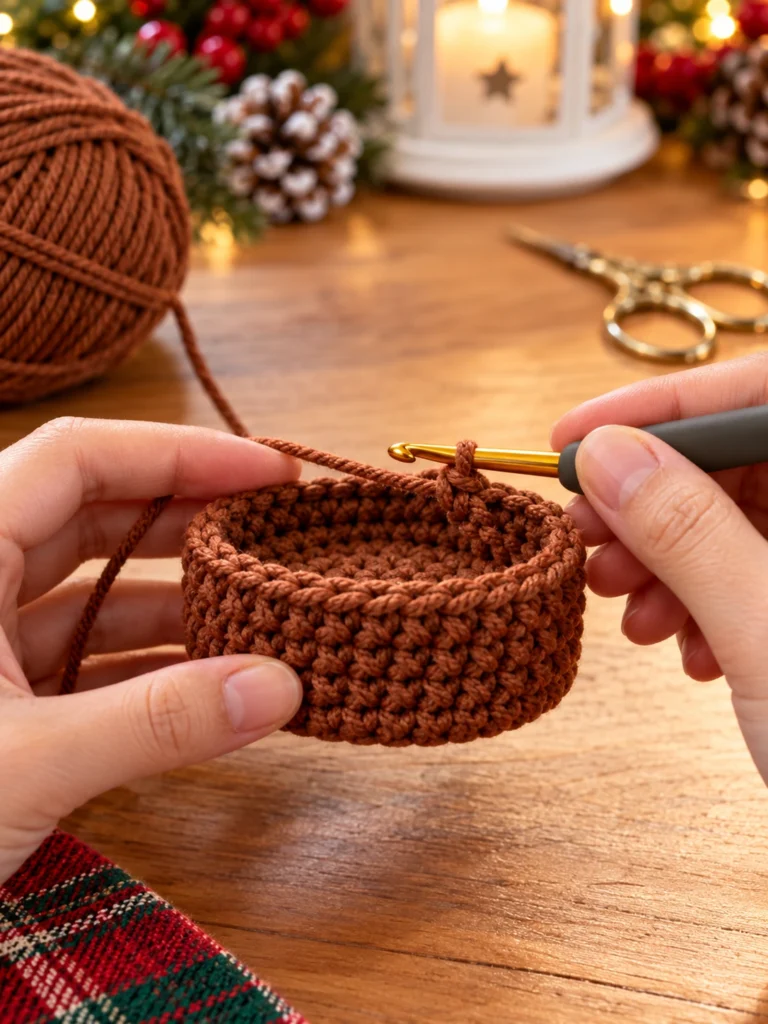
Begin by crocheting the brown base of the Christmas tree.
Work in rounds to create a short, sturdy cylindrical shape. Keep your stitches fairly tight so the base holds its shape.
Continue working around until the base reaches the height you want for your tree. The brown section will eventually act as the trunk and support the green Christmas tree layers.
Tips
- Use a stitch marker to keep track of your rounds.
- Keep your tension consistent.
- Make the base firm enough to support the upper sections.
- If necessary, add a little stuffing or a firm insert before closing the base.
Step 2: Start the Green Christmas Tree
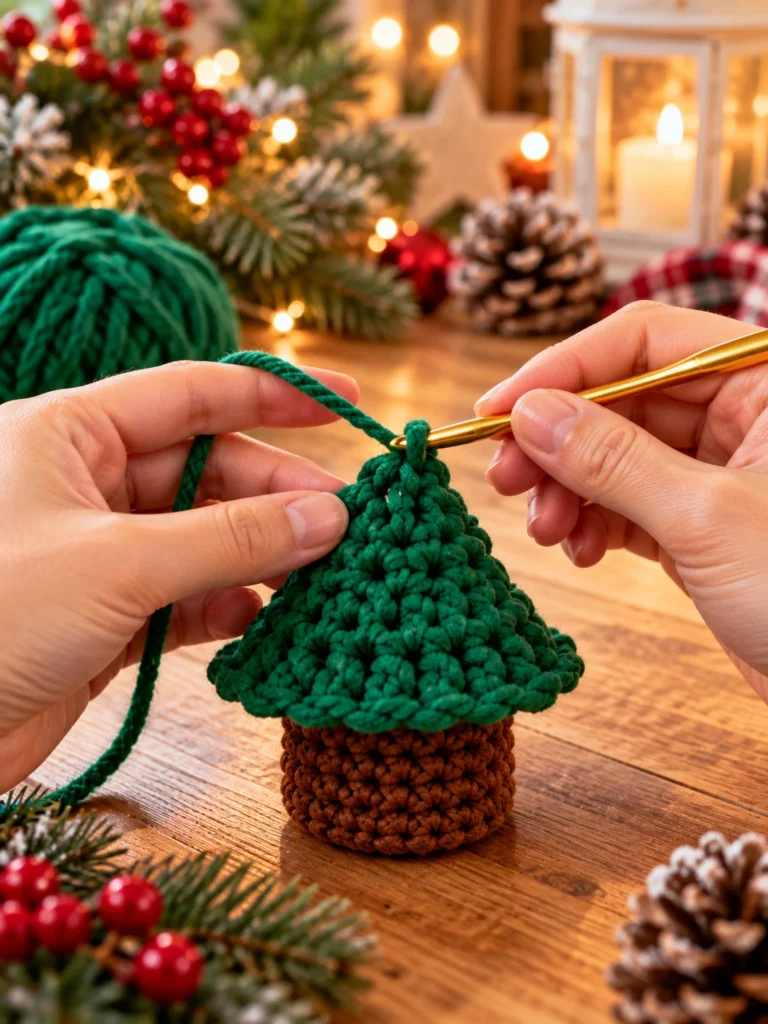
Switch to green yarn and begin building the first section of the tree.
The green piece should gradually become wider as you work toward the bottom, creating a cone-like shape. This forms the first foliage section of the Christmas tree.
Work around the brown base and continue increasing gradually so the green section spreads outward.
The goal is to create a gently sloping shape rather than a straight cylinder.
Step 3: Build the Layered Tree Shape
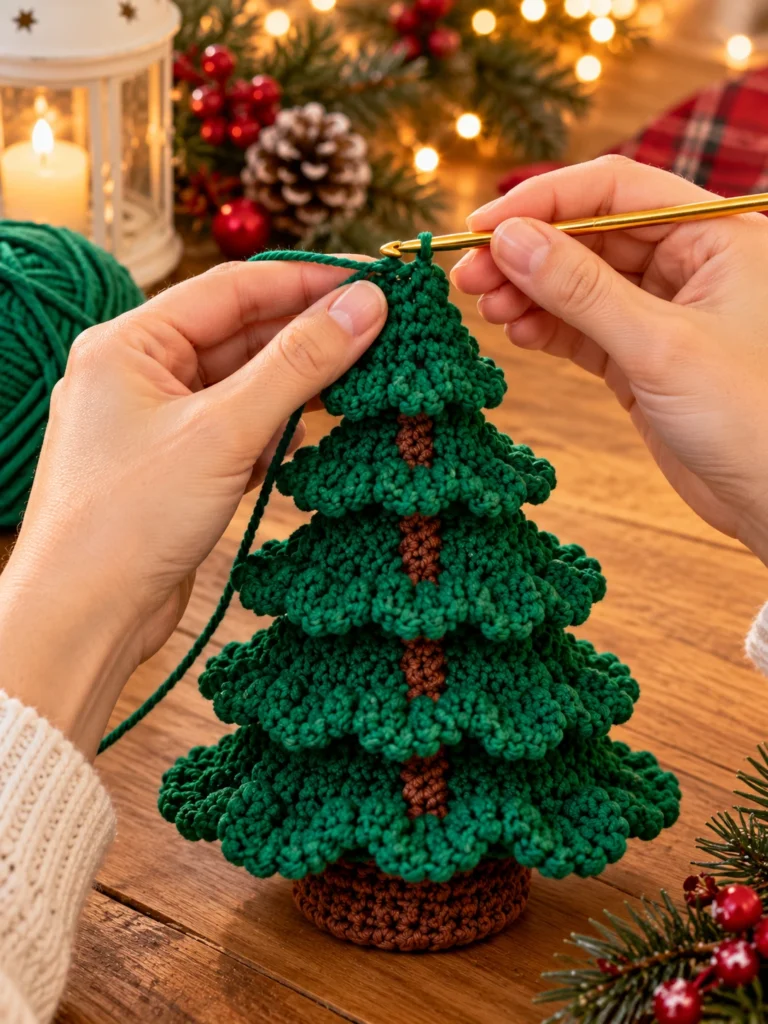
Once the first green section is formed, continue adding larger layers.
Each layer should extend farther outward than the one above it. This creates the classic Christmas tree silhouette with several tiers of branches.
Work the layers from the top downward, increasing the circumference as needed.
Creating the Branch Effect
For a more decorative appearance, allow the outer edge of each section to flare slightly. This creates the wavy branch effect visible in the finished tree.
You can keep the edges simple or use a decorative stitch around the outer rows.
Continue until your tree has several distinct layers.
Step 4: Add the White Snowy Edging
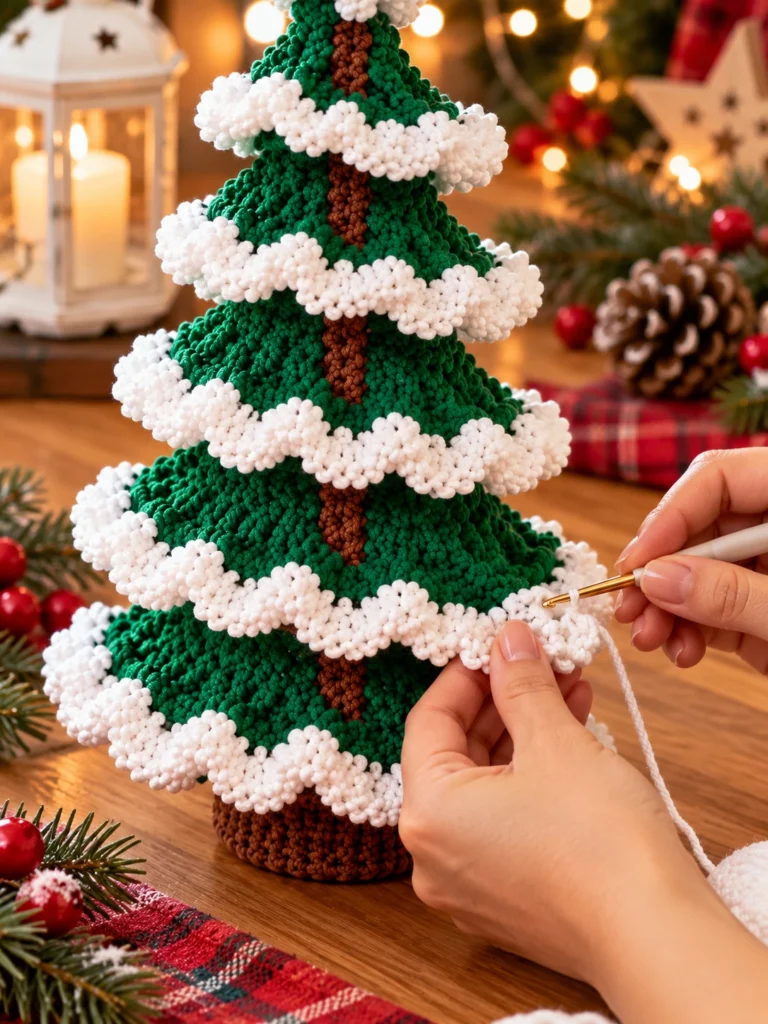
Now it is time to add the snowy white decoration.
Attach the white yarn to the outer edge of each green tree layer. Crochet along the edge, creating a soft, textured border.
The white trim should follow the natural curve of each branch layer.
This detail gives the tree a beautiful snowy appearance and makes the different layers stand out.
For a Fuller Snow Effect
Use a slightly thicker yarn or a fluffy textured stitch for the white edging. A raised or bobble-style border can create an especially soft winter look.
Repeat the white trim around each visible green layer.
Step 5: Finish the Top of the Tree
Continue shaping the uppermost section until the tree comes to a point.
The top should be narrower than the lower layers, creating a traditional Christmas tree silhouette.
Once the green section reaches the desired height, fasten off the green yarn and weave in the end securely.
At this stage, your tree should already look complete even without decorations.
Step 6: Crochet the Star
The final decorative piece is the star.
Using gold or yellow yarn, crochet a five-pointed star. You can make the star separately and attach it to the top of the tree afterward.
Keep the center slightly firm so the star maintains its shape.
Leave a small yarn tail when finishing so you can securely sew the star onto the top of the Christmas tree.
Step 7: Attach the Star to the Tree
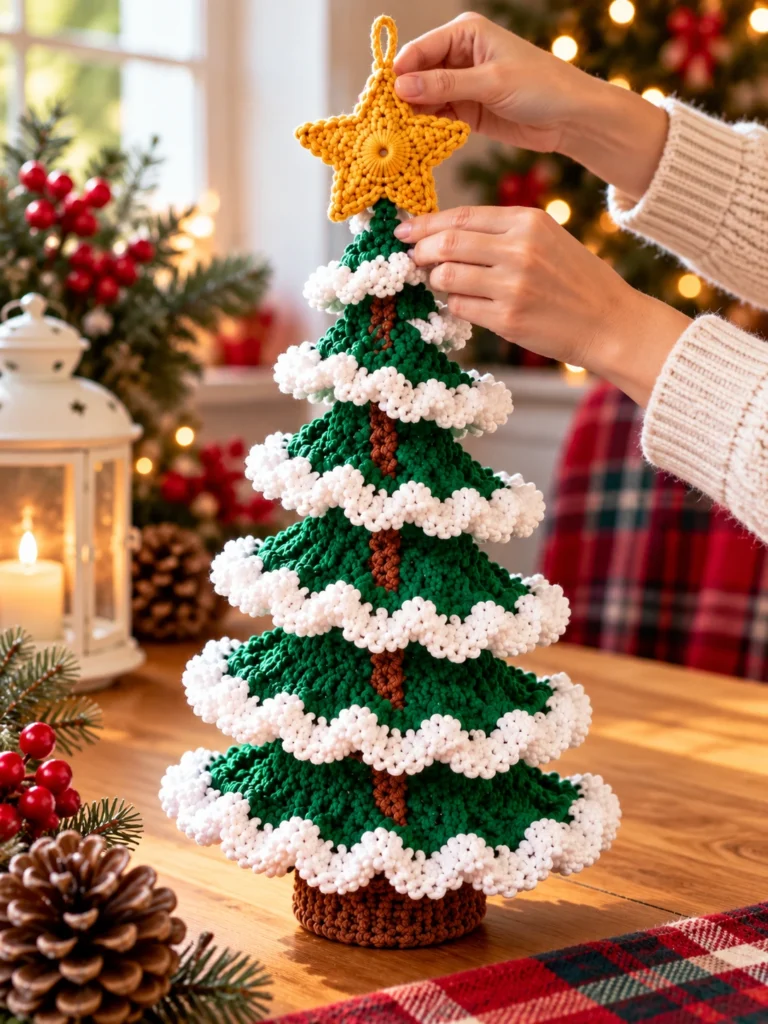
Place the crochet star at the very top of the tree.
Use a yarn needle and the remaining yarn tail to sew it securely in place.
Make several small stitches through the base of the star and the top of the tree. Keep the stitches hidden inside the green yarn as much as possible.
Once the star is firmly attached, weave in and trim any remaining yarn ends.
Finished Crochet Christmas Tree
Your handmade crochet Christmas tree is now ready!
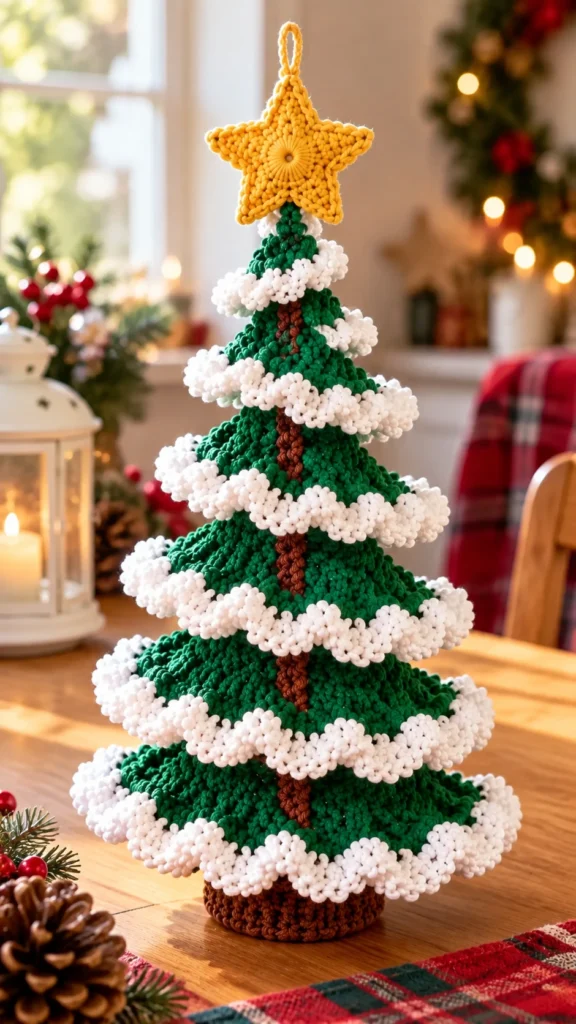
The finished design combines several simple elements:
- A sturdy brown crochet base
- Layered green tree branches
- White snowy edging
- A decorative golden star
- A dimensional three-dimensional shape
The result is a cozy Christmas decoration that can be displayed year after year.
Easy Ways to Customize Your Crochet Christmas Tree
One of the best things about this project is how easy it is to customize.
Change the Tree Colors
Instead of traditional dark green, try:
- Forest green and white
- Emerald green and cream
- Sage green and ivory
- White and silver
- Red and green
- Green with gold accents
Change the Snow Trim
The white edging can also be replaced with another color. Cream creates a softer vintage appearance, while metallic yarn can give the tree a more elegant holiday look.
Make Different Sizes
Create several trees in different sizes and display them together.
A small tree can be used as a table decoration, while larger versions can become a centerpiece for a Christmas display.
Where to Display Your Crochet Christmas Tree
This handmade tree works beautifully in many areas around the home.
Place it on:
- A Christmas dinner table
- A mantel
- A bookshelf
- An entryway table
- A coffee table
- A holiday craft display
- A bedroom shelf
- A Christmas-themed centerpiece
You can also make several small trees and arrange them together with pinecones, ornaments, candles, and evergreen branches.
Crochet Christmas Tree Decorating Ideas
For an even more festive display, add small handmade decorations around the finished tree.
Try combining it with:
- Crochet snowflakes
- Mini crochet ornaments
- Pinecones
- Red berries
- Small Christmas bells
- Wooden stars
- Fairy lights
- Artificial evergreen branches
The combination of green crochet, white snowy trim, and natural Christmas decorations creates a warm handmade holiday atmosphere.
Final Thoughts
This crochet Christmas tree pattern is a fun holiday project that combines simple crochet techniques with beautiful decorative details. The layered green branches give the tree plenty of dimension, while the white edging creates a snowy winter effect.
The finished tree is small enough to display almost anywhere and can easily be customized with different colors, sizes, and decorations.
Whether you make one for your own Christmas display or create several as handmade gifts, this crochet Christmas tree is a lovely way to add a personal touch to your holiday decorating.